

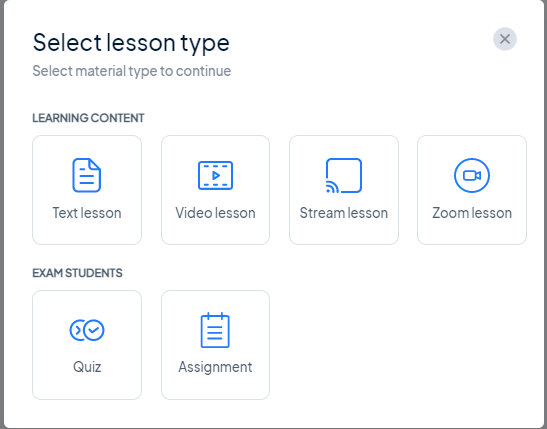
For example, let’s create a video lesson. As you already know, MasterStudy LMS offers 6 types of lessons:
MasterStudy LMS V 4.8.0 – New Course Builder Release!
Version: 4.8.0 May 11, 2023We are excited to announce the official release of MasterStudy LMS 3.0. As our dear current users may remember, we previously launched a beta version and invited our users to participate in testing it before the official release. Now, we are thrilled to let you know that the new version (with some improvements and bug fixes) is officially available! In this update, we have made significant changes to the design and template of the course builder. We have completely revamped it to provide a better user experience and more advanced features. In this post, we will go through all the changes step by step to give you a better understanding of what to expect. Let’s dive into the course-building process!
Step 1: Course Creation
When creating a course, users or instructors will now notice a completely new builder design. We hope that it is now even easier to create a course. The main builder consists of fields such as:
- Course Name
- Learning Material URL
- Course Category
- Course Level
- Image or Banner
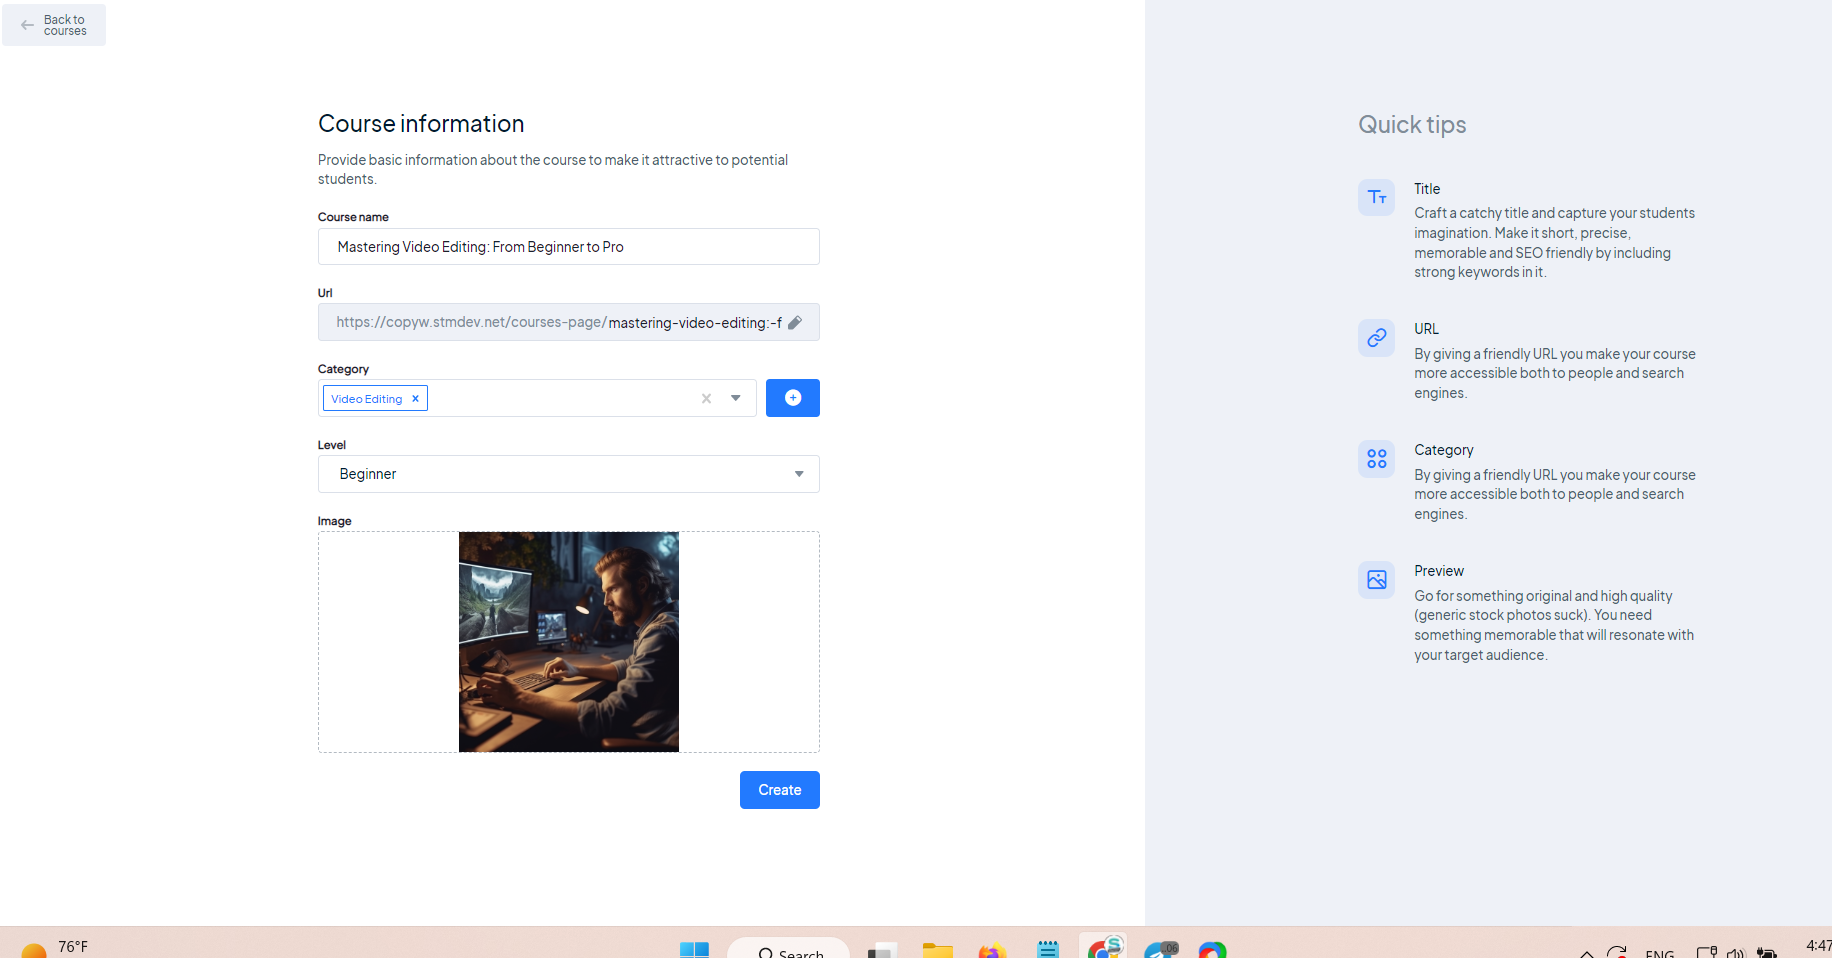
Course name is, obviously, for the course title. URL is for changing a link to a single course in case you want to see the specific one (by default it uses the name of the course at the end of the link). Category is for selecting the appropriate section for the course. Level is for determining the difficulty of the course. Finally, Image is for inserting a course banner.
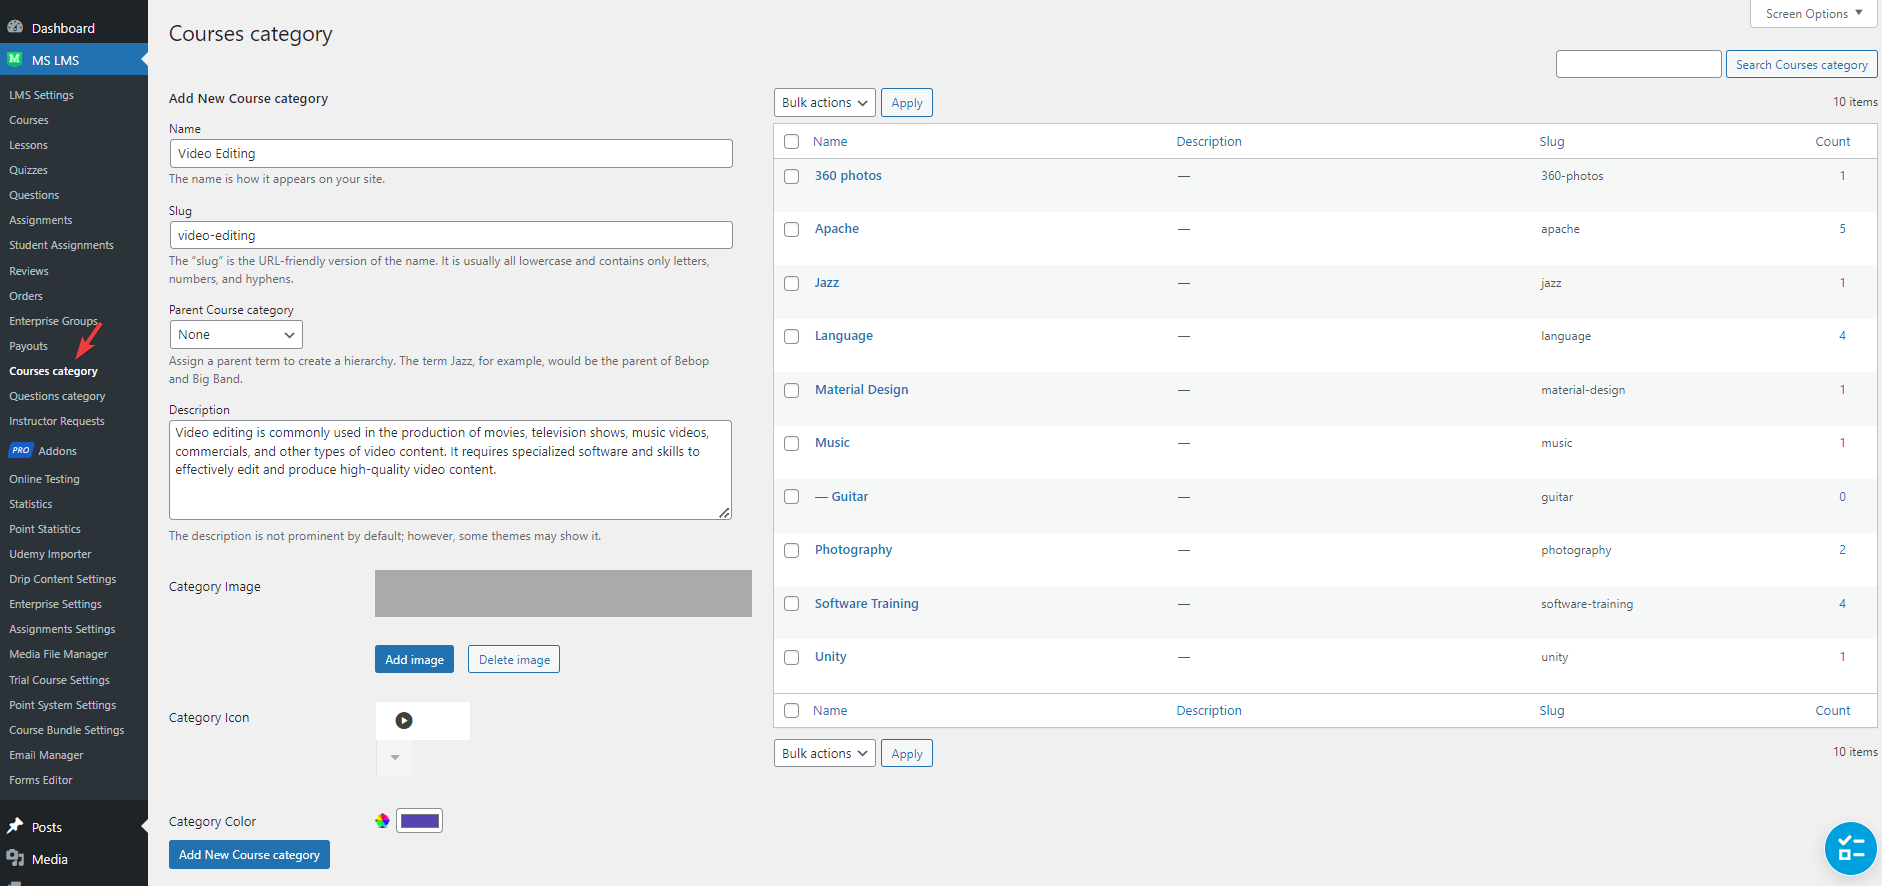
Only Course Name and Category are mandatory fields to fill out.
Note: to add a category, you need to go to MS LMS -> Courses Categories.
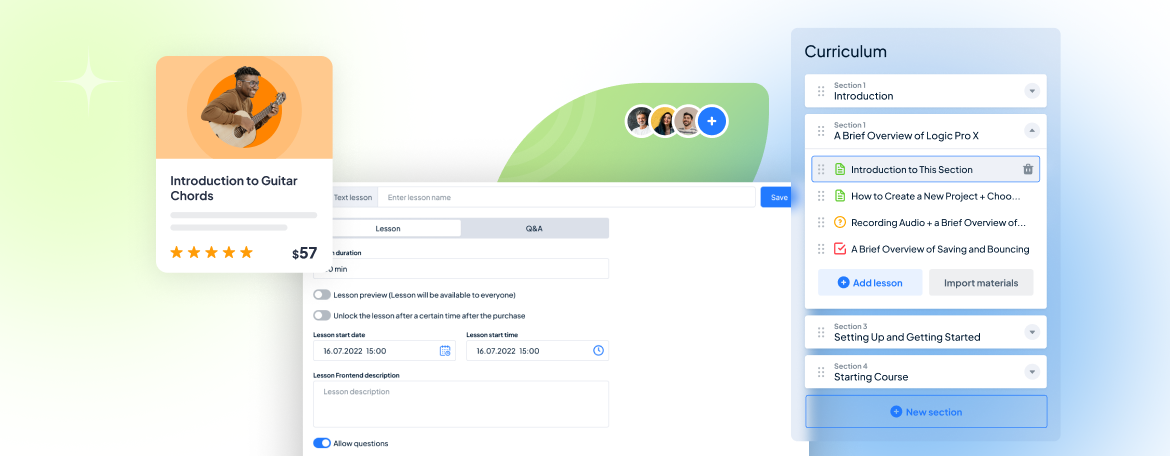
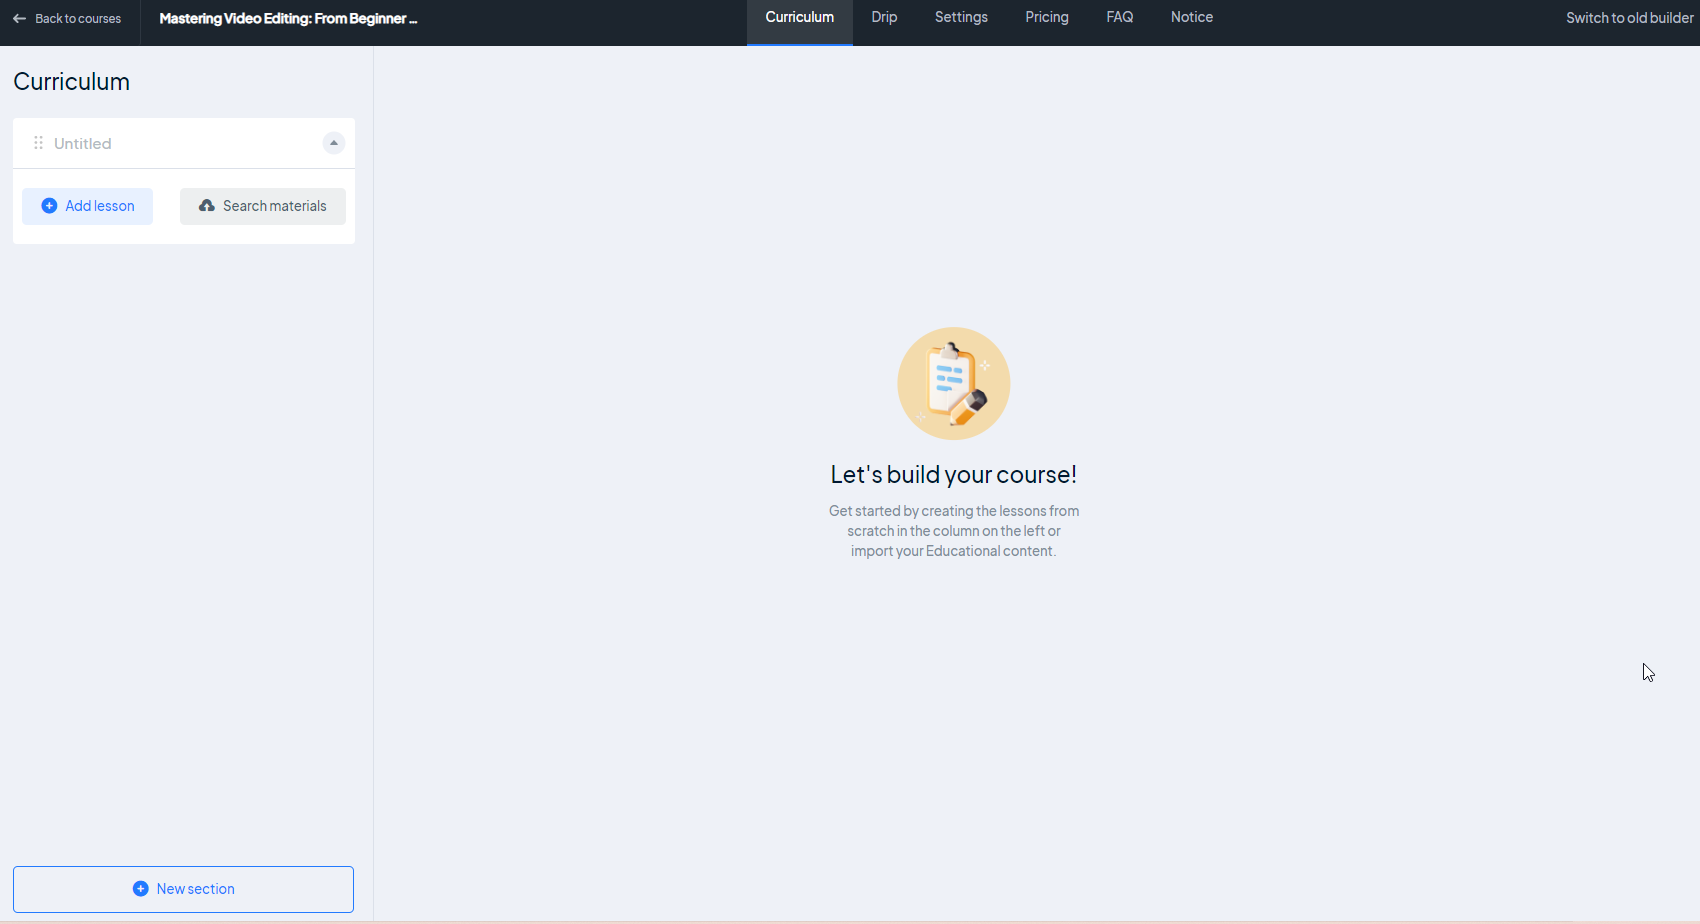
Step 2: Curriculum Building
To begin with, let’s move on to the second step – curriculum building. At the start, you’ll be prompted to add a new lesson or search for existing ones.
- Text Lesson
- Video Lesson
- Online Streams
- Zoom Lesson
- Quiz
- Assignment
In this new builder, we’ve categorized all lesson types into two categories: Learning Content and Exam Students. Quiz and Assignments have been included in the Exam Students category, as they’re designed to test and evaluate students’ knowledge. The rest of the lessons are included in Learning Content, as they provide theoretical knowledge as a basis.
We won’t dive into the differences between each lesson type here, as we have a detailed guide in our documentation on this topic. Let’s go back to creating a video lesson. Video lessons are incredibly cool and are gaining popularity at a rapid pace nowadays.
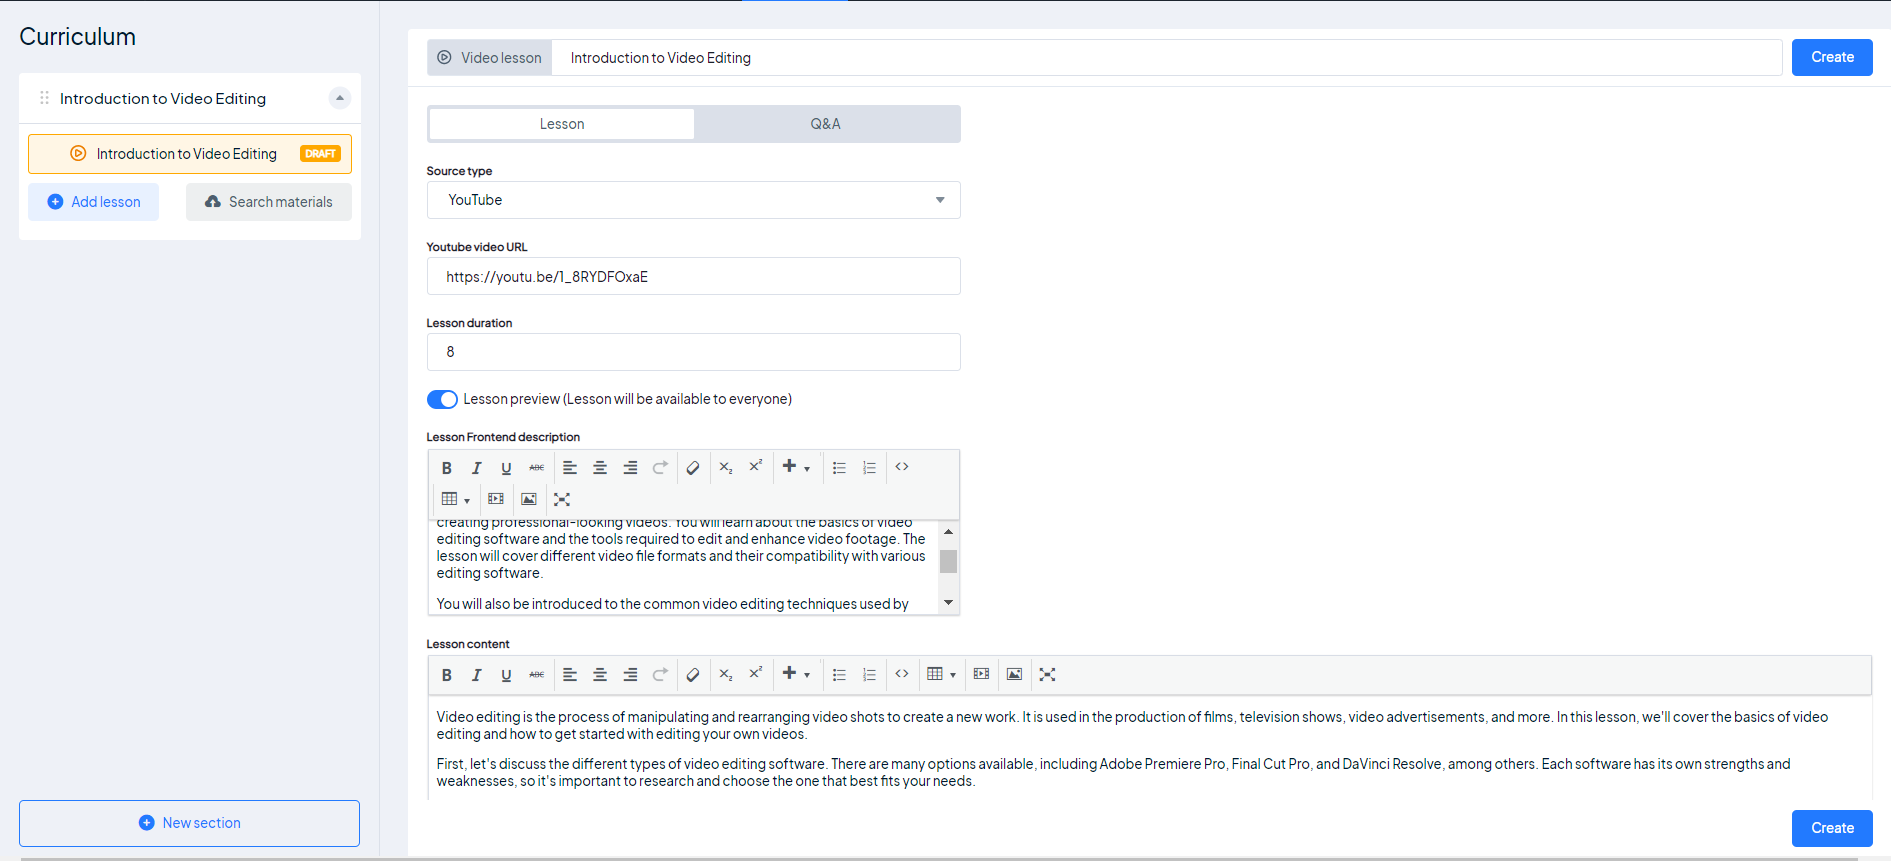
When adding a video lesson to your course in MasterStudy LMS, a new window will appear with settings and properties for your lesson. The properties and parameters for each type of lesson are different. In the case of a video lesson, you will need to determine from which source the video will be uploaded.
There are 6 types of video sources available in MasterStudy LMS:
- HTML (MP4)
- YouTube
- Vimeo
- External Link
- Embed
- Shortcode
Plus, there is also integration with Presto Player.
Note: If you want more details about each video source, you can learn from our documentation part.
In this example, I will show you how to add a video lesson from YouTube as it is usually the most popular choice for video source.
To add a video lesson, all you need to do is insert the video URL from YouTube, determine the duration of the lesson in minutes, write a short description of the lesson, and the main accompanying text content for the lesson. Additionally, you can make the lesson available as a Preview mode. This is very convenient if you want to demonstrate the advantages of the course to potential students before they purchase it.
You can add as many lessons as you want in a single course. Not only lessons but quizzes, assignments, and so on.
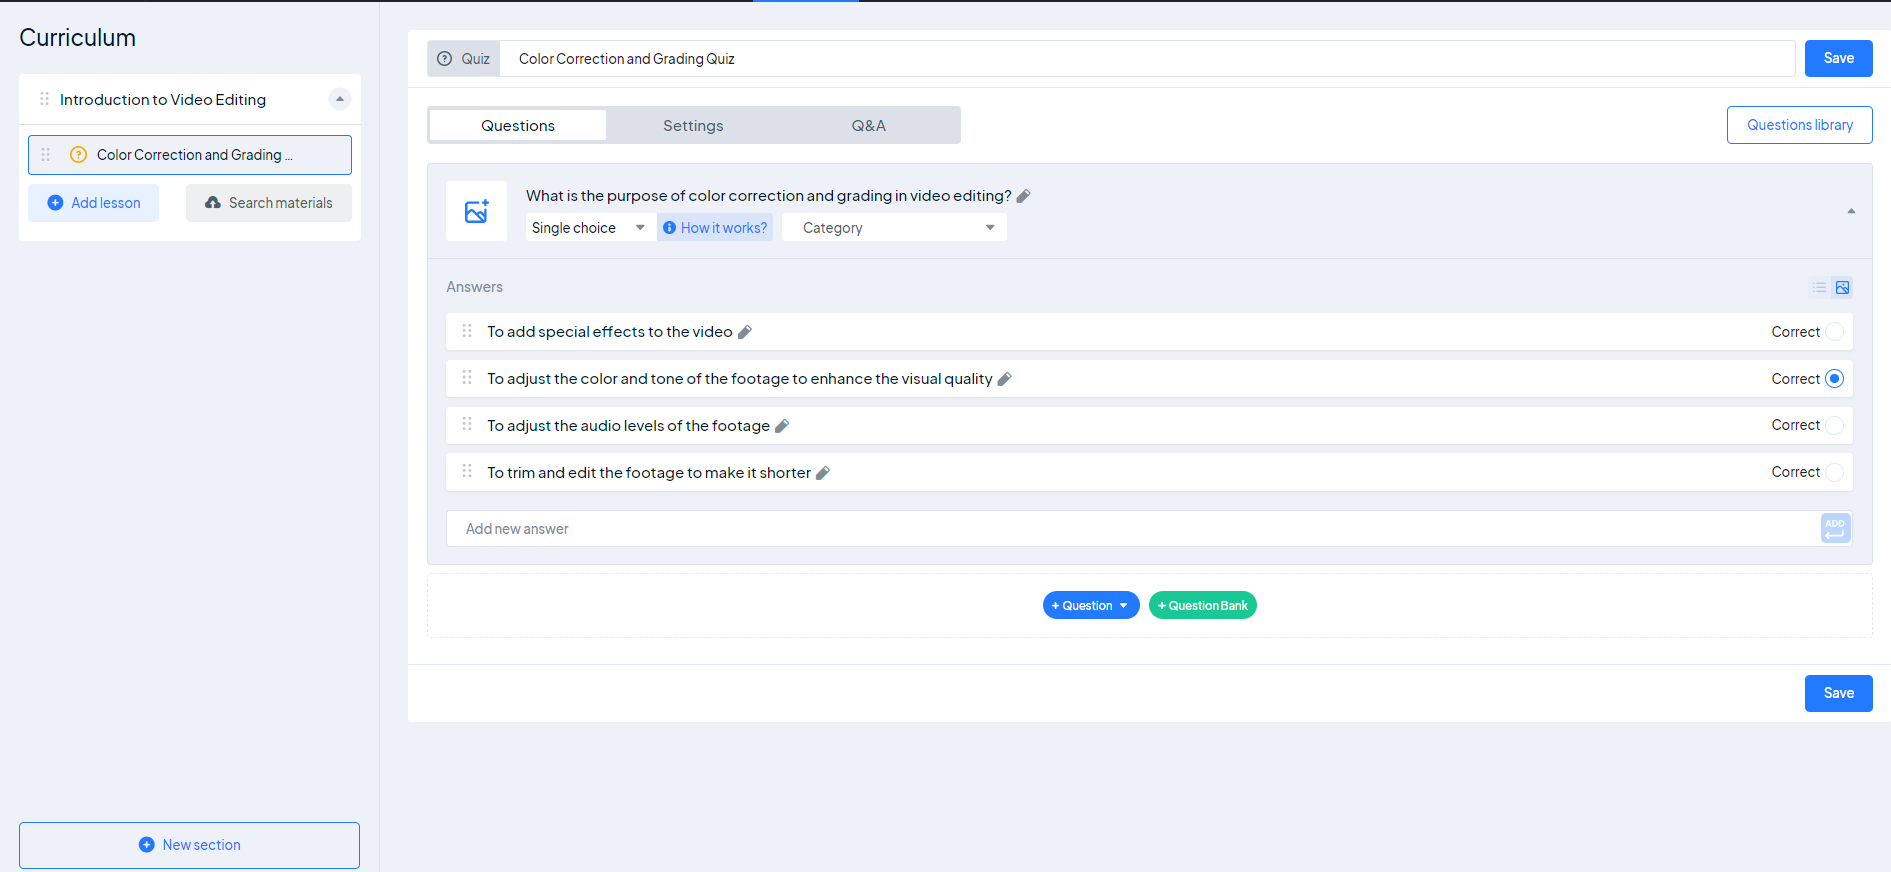
In addition to creating excellent video lessons, you can also use MasterStudy LMS to create quizzes to test your students’ knowledge. There are 7 types of quizzes available in MasterStudy LMS:
- Single Choice
- Multi Choice
- True or False
- Item Match
- Image Match
- Keywords
- Fill the Gap
Each quiz is designed according to its type. But they all follow the same basic principle: write a question and provide answer options (including the correct answer). With the new course builder, creating quizzes has become even more convenient and intuitive.
Step 3: Make the Lessons a Sequence
One of the great and in-demand features of MasterStudy is the ability to create dependencies between lessons. This allows for the creation of a logical sequence of related lessons for students to follow in order to learn and gain knowledge effectively.
This feature was available in the old version of the course builder, but now it has a dedicated section and the process of creating dependencies has become more intuitive and user-friendly. With the improved interface, creating a sequence of lessons that logically flow from one to the next has never been easier.

Step 4: Prepare Your Course to Release
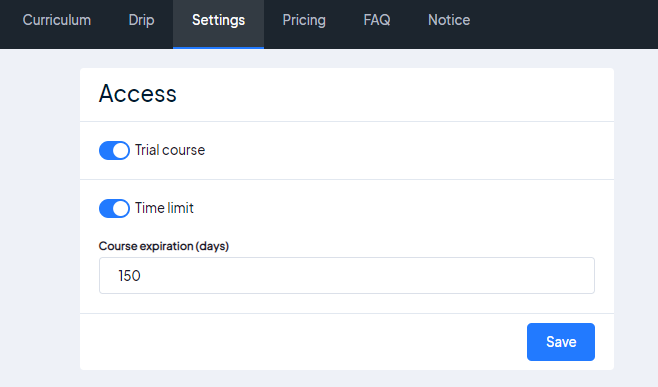
After creating the curriculum and all the educational content, you can manage course details, access levels, status, start and end dates of the course, and more. There is a whole section dedicated to this called Settings which is divided into five subsections:
- Main
- Access
- Prerequisites
- Course Files
- Certificate
In the Main subsection, you can preview the primary information you entered when creating the course. You can also assign a label or status to the course from the three available options: Hot, New, and Special. Additionally, you can set the date when the course status will take effect and when it will expire. Finally, you can add a Featured label to the course if you want to draw attention to it.
In the Access subsection, you can set the course as a trial and specify the duration of its validity in this mode.
Prerequisites allow you to determine the percentage of completion required for the course and unlock the following course. This feature is very convenient for creating a whole educational program.
In Course Files, you can attach additional materials in various formats (up to 2 GB).
Last but not least is the Certificate subsection, where you can choose either the certificates you built using the MasterStudy LMS certificate builder or upload your certificate.
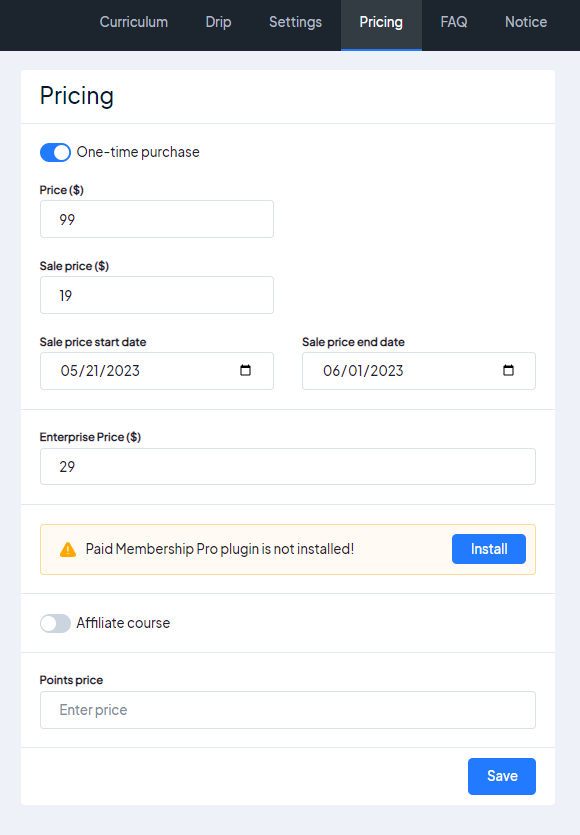
Step 5: Monetize Your Course
After defining all the details of the course, you need to set prices for the course if you want to sell it. For this purpose, a whole section called Pricing is allocated in the new course builder.
In this section, you can specify the course cost for various conditions:
- If you want to sell the course at a one-time price
- If you want to sell it by subscription
- If you want to include a discounted price
- If you want to add a special price for student groups
Additionally, you can make the course an affiliate product.
Note: to activate subscriptions for courses, you will need a separate plugin called “Paid Membership Pro.
Step 6: Final Touches
In the final step of creating a course, it’s important to include some brief questions and answers about the course and its features, as well as any additional information that students should know before beginning their studies. To accomplish this, the new course builder includes two separate sections: FAQ and Notice.
In the FAQ section, you can add commonly asked questions about the course, such as the duration of the course, the requirements needed to enroll, and the types of materials that will be covered. This section provides a helpful resource for students to reference throughout the course.
The Notice section allows you to communicate any important information to students that may not fit within the scope of the course itself. For example, if there are certain conditions or prerequisites that students need to be aware of before enrolling in the course, you can include that information here. You can also use this section to provide additional resources or support for students who may need it.
Conclusion
To sum up, we have completely changed our approach to creating courses and educational content, and have undergone a fair redesign of our course builder. Based on numerous positive reviews (which were collected during the beta launch), creating courses has become even easier, faster, and more attractive.
However, we do not stop there and will continue to improve MasterStudy LMS by adding new features and functions. Our users can also help us with this by submitting their suggestions for improvement through our Request Feature form.
Visit MasterStudy LMS Changelog to view all implemented updates and fixes.

