
Smartphones are probably the most favorite gadgets for people across the world. We sleep with our phones, eat with them, do our work on them, and enjoy the multiple entertainment activities. All the above are accessible to us because of the variety of applications. Developers do their best to create interesting and interactive apps for any existing purpose allowing us to download them just with one click and make our lives a little easier.
But being so simple for us to get the app is not comparable to the developers’ upload process. Before the app is approved and available in the store, they have to go through the tough process of publishing. Multiple reviews, registration, and other important and unclear steps only take time and frighten.
For all the developers out there we prepared a quick guide highlighting key steps you need to take to upload your own application to the Google Play Store or Apple Store.
Where To Start
Building an app simply means you have only half done. And one of the missing factors is usually unaccountable requirements from app store guidelines. This happens because appreneurs simply don’t look through the guidelines. And, with this simple yet so important step, we suggest you start your journey.
We provide you with a detailed guide, covering all the steps, and show how to avoid possible pitfalls.
How To Submit Your App To The App Store
Entering the Apple Store and presenting your application on the platform gives you the chance of distributing your app to millions of potential customers.
There are 8 main steps required to publish your iOS app in Apple Store:
- Check the Guidelines
- Test your app
- Create an Apple developer program account
- Create an iTunes Connect app record
- Prepare your app for distribution
- Upload your app
- Submit your version for official review
- Release
First, make sure you have a clear and complete understanding of Apple requirements. The main reason for this necessity is that due to the not relevance of your app you may face the possible rejections. In order to minimize the risk of it you need to precisely follow the store guideline.
Those requirements exist mostly for the customers of the store. Whenever they enter the market buying and downloading the app they need to feel confident and safe about it. To supply the customers with only high-quality and certified products, Apple Store set requirements for developers.
Apple Store Review Guideline consists of 5 sections:
- Safety — your app should not contain offensive and improper content. This may include racist references, comments inciting religious intolerance, false information. Moreover, the Safety section is also divided into smaller groups like user-generated content and physical harm, so make sure you thoroughly look through all of them.
- Performance — this covers the technical performance of the app, its completeness, hardware compatibility, and software requirements.
- Business — in this part you need to concentrate on your business objectives and monetization options. You need to show a clear business model and explain how your app works, and this has to be obvious to review commission.
- Design — customers prefer products that are simple, innovative, easy to use. You are not obliged to come up with a perfect design, but still have to follow certain minimum requirements to have your app approved.
- Legal — of course, the app must comply with all legal claims and it should apply to all locations your app will be available in.
As you see, there are not just technical guidelines. Apple Store has lots of other details you need to aware of to avoid rejection of your app after submission for review.
Test your App
Now when you learned all the requirements you can move to the next step — testing your app for good performance. This step will help you to identify any issues, bugs and glitches. There should be no crashes detected. It is also useful to test the app on different iOS devices, as they have differences in sizes that may affect application performance. One good tip — to test the user experience, just to be sure your app won’t cause negative reactions.
In case you found any issues, solve the problem and take a new test. When no bugs are detected, you are ready for the next step.
Register Developer Account
Registering an Apple Developer account is not free and will cost you $99 per year. However, this step is mandatory, and only with a proper account you are able to submit the app.
Apple Developer Program allows using additional great tools, such as analytics of your app, beta testing, and much more.
Being a member of the Apple Developer Program brings lots of benefits, including access to innovative Apple technologies that will help you to create a great user experience.
Create iTunes Connect Account


By creating an iTunes Connect Account you making it possible to effectively manage your app. iTunes Connect is a suite of web tools helping you managing the app. It is also can be used to manage the content on iTunes Store.
You will need to create the whole record in iTunes Connect that will include all the information that is needed to manage the app.
Prepare the app for distribution with the proper data
To be published your app should contain a specific set of information. This includes:
— app icon;
— app screenshots;
— metadata.
First, you need to provide an icon for the app. Your personal icon will represent the application throughout the store. Make it attractive and memorable.
Then, you should attach several screenshots and app preview to visualize the user experience. You can also use a short video captured from the app. A good tip is to combine screenshots with one video.
The app also should have a detailed description. The metadata includes:
- The app name
- App description
- Keywords
- Categories
- Version
- App Rating
- Marketing URL
- Support URL
One of the tricky parts is the description. Don’t use the description as an aggressively promotional tool, this might turn off users, as well as reviewers.
Archive the app and store it in the bundle managed by the platform. Don’t rush to upload the app. Launch the iTunes Connect validation checks on the archive to make sure it meets minimum requirements.
Upload Your App
After you entered all the necessary details, you can upload your app. For uploading, you need to use Xcode or Application Loader. When the record for your app is created. After you create an iTunes Connect record for your app, the upload is displayed on the Activity section of “My Apps”. Make your version set to 1.0.0 if this a new app.
Publishing the app is very simple, Xcode takes multiple steps all by itself. Create the app archive by selecting the Generic iOS Device from simulators. After that let the program to bundle your app. You need also to select the method of distribution, which is going to be iOS App Store. Wait for the several checks to be finished. The time for upload depends on the size of your app.
If there are no problems your app will be uploaded. And the last step that is left is to submit it for review.
Submit for review
You sent your archive via Xcode. Now App Store Connect is going to process it. Select your app, and that’s it. Click on Submit for Review button. So before the release, your app will be reviewed by the Apple team. The status of the app will be changed to Waiting for Review. It can take from 1-3 days.
If you face the rejection, you can resolve issues in the Resolution Center. Apple communication contains all the information regarding the rejection reasons.
Releasing Your App
Once your app has been reviewed and approved, you can request either Manual or Automatic release of the approved app.
How To Upload Your App to Google Play Store
For Google Play Store the process of app upload does not differ that much.
Again, our huge recommendation for all developers is checking the guidelines of the store and its restriction policy. Moreover, try to study as much as you can about the restriction even before you started to build the app. That will help you predict the negative outcomes and will save you from unpleasant surprises.
In Google Play Store there are also multiple sections listing lots of requirements including:
- Child endangerment
- Inappropriate Content
- Financial Services
- Gambling
- Illegal Activities
- User-Generated Content
- Unapproved Substances
So take your time and study everything. Once you are sure your app corresponds to the level of relevance, move to the next step.
Create a Developer Account
To upload your app you need to create a developer account in Google Play Console. This step is very simple and will take just a little time to accomplish it. Mostly, everything you should do is to sign-in with your Google Account, pay a registration fee which is $25 (one-time payment), and complete your account with details.
Create a Google Wallet Merchant
This type of account is needed in order to receive payments from your users. You can connect your merchant account with your developer account and easily manage financial transactions.
How to do it? Simply sign in with the developer account and set up Merchant account in the section of financial reports. Fill in all the information and business detail and you are all set.
Upload the App on Play Store
When everything is prepared and the app is ready you now can upload it to Google Play Store.
Add the new application and specify its title. Here you have two options, you can either upload APK file or prepare the Store Listing.
If you decided to upload the APK, just follow to the App Releases where you need to select the type of release: an internal test, closed test, open test, or production release. Create the release and keep on following the steps of APK uploading instructions.
An internal test, closed test, or open test are the options that you can use if you are planning to test your just among the small number of users. If you are sure that you can introduce the app to a larger audience, then you need to select the production release option. However, we recommend you no to rush with this, and have several tests to be sure you provide the good service.
To Prepare Store Listing you need to fill all the information about your app for Google Play Store. Check the small tip, we recommend you to go through this step with your marketing specialist. Even though you shouldn’t include here all the promotional information, still you need to support the description with the strong text content.
Here is what you have to include:
- App title, a short description and a full description;
- Icons, screenshots, and videos;
- Add categories for your app;
- Provide contact details;
- Add content Rating
- Add a link to Privacy Policy.
This data will create a complete profile for your app. This will be useful first for customers and will help them to decide whether to get your app or not.
Choose a Pricing Model
You can make your app either Free or Paid. Please remember, if you upload your app as paid, you can later change it to free, but not vice versa. So be careful. After you decided on the pricing model, select the countries you want your app to be distributed.
Publish Your App
Check one more time, whether you filled everything correctly and completed all the steps. If everything is looking good you can finally publish your App. Wait for the app to be reviewed and once it approved you can celebrate.
Usually, it takes up to 7 days for the Google console team to review your app. During this time your app will be under the “Pending Publication” status.
Be well-prepared when uploading your app to the store. There are tons of small details that can cost you the time while dealing with rejections reasons and resubmitting.
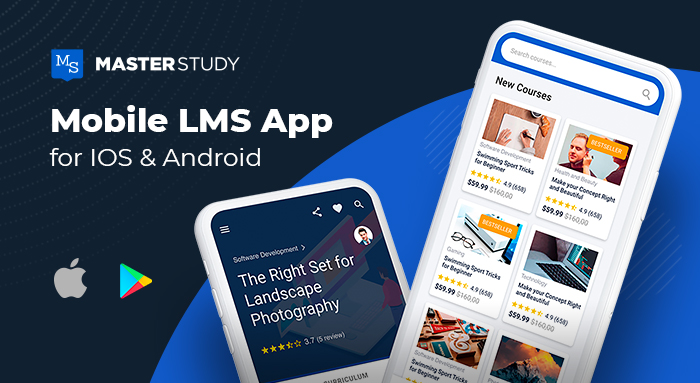
We, in StylemixThemes, tested it in our own experience. Recently we launch the MasterStudy LMS Mobile App and put ourselves through the important step of uploading the app to both Google Play Store and Apple Store. Not everything was perfect for the first time, and we also happened to receive the rejection. But it only came up for us as a good experience that we wanted to share with all the developers to help you prepare your apps for publication.
Be attentive, test your application, and follow all the steps from the store guidelines.