
Since you’re here, we’re assuming that you want to build a website? Starting something new can definitely be fearsome. But we’ve got your back so don’t stress about it.
Even if you’re a beginner or have ideas on how to proceed we’ll help you through the whole thing. We’re going to guide you on how to build a WordPress website step by step.
The new generation is all about DIY (do it yourself), so why would you be left behind on this? Instead of relying on someone else, build your own high-quality WordPress site by yourself. Doesn’t matter if you have a small business or a large one, having an online presence never hurts.
The best thing about building a WordPress website is it’s immensely cheap and less time-consuming. The most important things that you’ll need to build a WordPress website are
- A domain Name
- Install WordPress and hosting
- Choose a perfect WordPress theme to match your brand
- Install and activate necessary WordPress plugins
- Be attentive to details
And.. You’re good to go!
How to Build a WordPress Website in 2022?
- Does Having a Website Cost A Lot?
- Best Platform to Start
- Step 1: Domain Name Selection and Purchase
- Step 2: Set Up
- Step 3: Selecting a Proper Theme
- Step 4: Installing Plugins
- Step 5: Adding Content
- Step 6: Manage Your Website Settings
- Conclusion
Does Having a Website Cost A Lot?
Are you getting cold feet because of the cost? The cost amount varies on the type of website you want to build. If you’re just starting your business, we suggest you start small as you grow.
Nowadays many online stores tend to spend a lot of money on building and marketing their business. But if you focus on building a functional, appealing and a user-friendly website, you won’t need to spend so much money.
Best Platform to Start
First of all, let us tell you why you should consider WordPress for your product or service-based website. WordPress is not only open source and free, but also has a large number of functional plugins that will make your website fully functional.
You get a variety of pre-built website designs to choose from. Also, you can even customize the website with your preferred style. You will be in complete control of how your website should look. If you don’t like any feature that you’ve installed, you can exchange it with another one at any time.
You don’t have to learn the functionalities of a bunch of tools for building a website using WordPress. And you don’t have to be tech-savvy or a developer to build your own website.
You can always contact us, so we can set up your WordPress website.

Let’s jump in to the main topic and see how you can make a WordPress website step by step.
Step 1: Domain Name Selection and Purchase

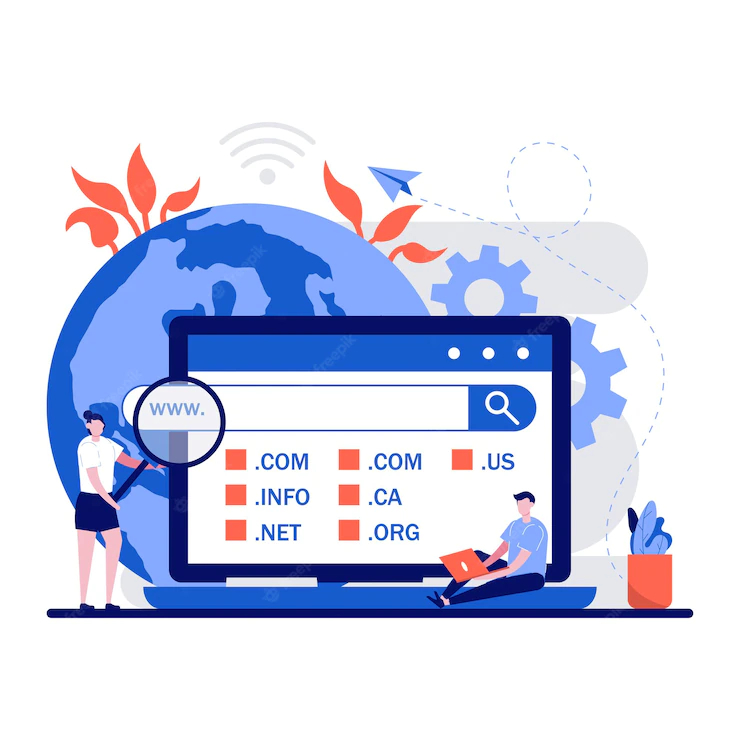
The first important thing of building a WordPress website is selecting the perfect domain name. The domain name will be the one that will be known to all your customers. For example (google.com, facebook.com etc.)
Try to keep a domain name that matches your style and identity as a brand. These are a few things you should definitely consider while choosing your domain name
- Keep it short and understandable
- Try to give a catchy name to make it unforgettable
- Look out for what extension to use.
To further understand the uses of extension here’s a simple guide for you on extensions work,
- .com usually means that your website is a commercial website
- .net is largely used by ISP providers
- .org means that your organization is non profit
- .biz used for small businesses
- .gov is for government based websites
- .edu is routinely used for educational websites
- .io is a good extension option for tech-based companies
Now that you know what these extensions are used for, it’s time to choose one and buy a domain name specially for you.
You may ask where you can buy a domain name from. There are multiple websites where you can buy one. Some of the most popular domain name buying websites are Bluehost, Domain.com, GoDaddy etc.
You can find more domain name information with just a few google searches.
Step 2: Set Up

Let’s say you’re using Bluehost to buy your domain name. What you should do next is,
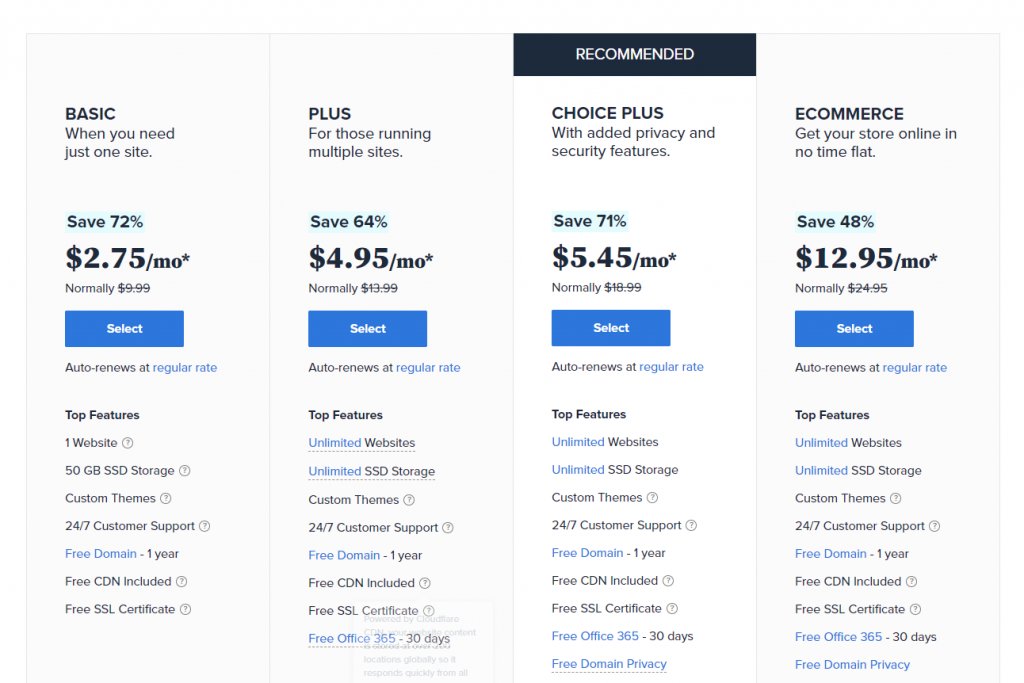
- Select a plan

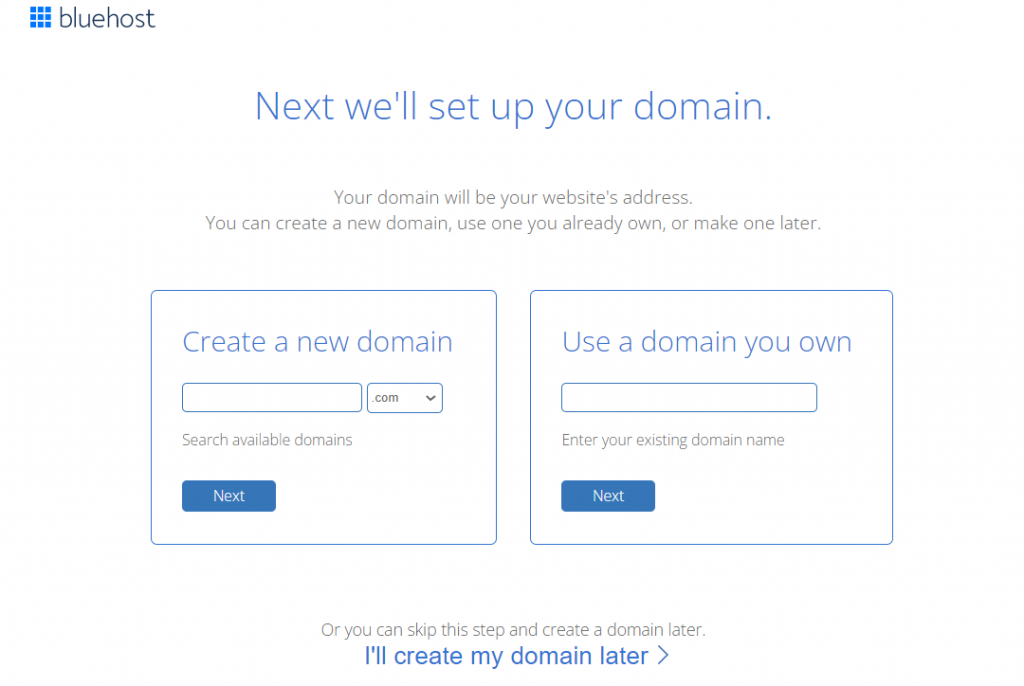
- Fill out the sections

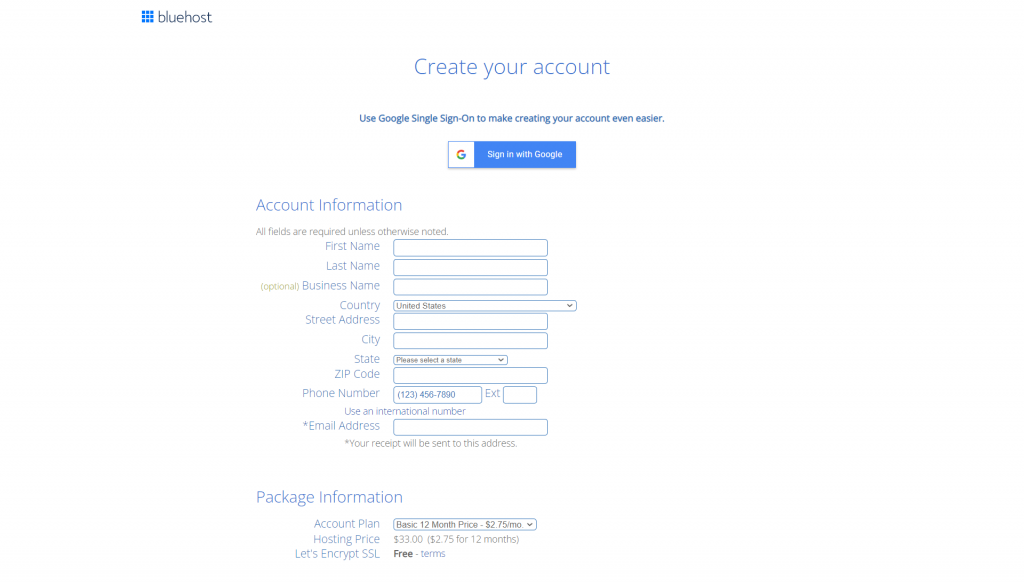
- Create your profile and provide the billing details. In this section try to fill out the details carefully. Select the package extras. Read the terms and conditions properly and finally click submit to create the profile

A few of some tips we’d like to give you is that you should consider the plans that saves you money. Check out how many days of money-back guarantee the providers give and choose your best option.
After you complete your whole purchase process, you will receive an email with instructions on how to access your web hosting control panel (cPanel).
This is the dashboard for your hosting account. You can manage everything from getting support to setting up an email address.
Please note that this is where WordPress will be installed.
Installing WordPress
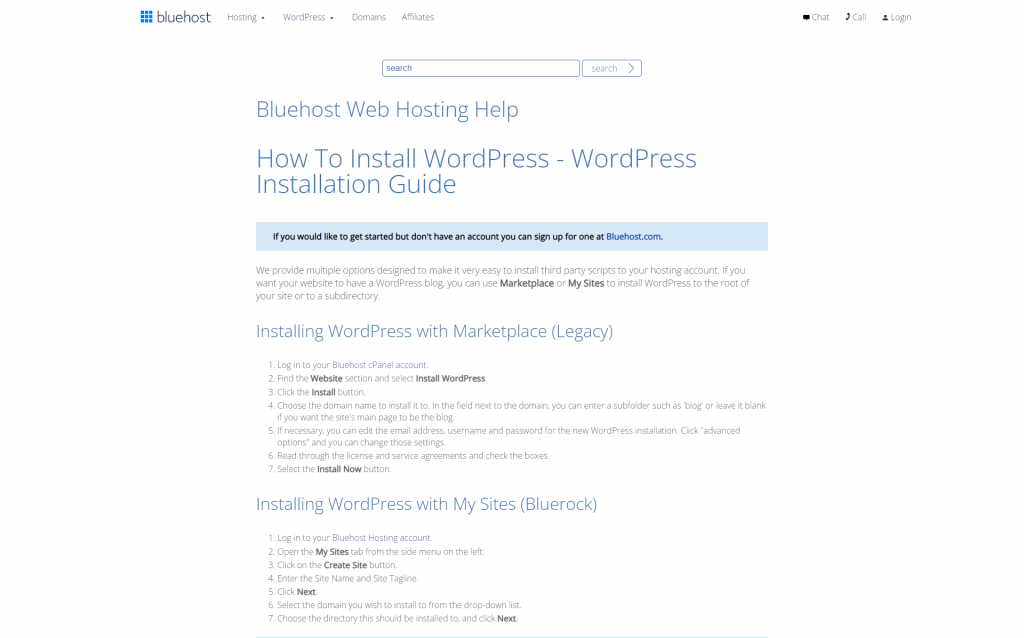
For installing WordPress, you can do two things. You can use the one-click installer that Bluehost provides. They have given this wonderful tool to non-technical people. This is not only a time saver but also lessens the hassle to a great extent.
This following guide will help you with the installation via Bluehost.

You can also access the WordPress dashboard by typing yoursite.com/wp-admin/ into your browser.
If you’re using some other web hosting service then you’ll get the instructions on how to install WordPress from them as well.
However, if you want to explore a little more and want to manually install WordPress you can do that as well. The installation for WordPress manually can be a little tricky. But don’t worry we’re giving you a guide for that too,
- First, download WordPress to your computer
- Then, reupload the WordPress to the dedicated hosting provider that you’re using.
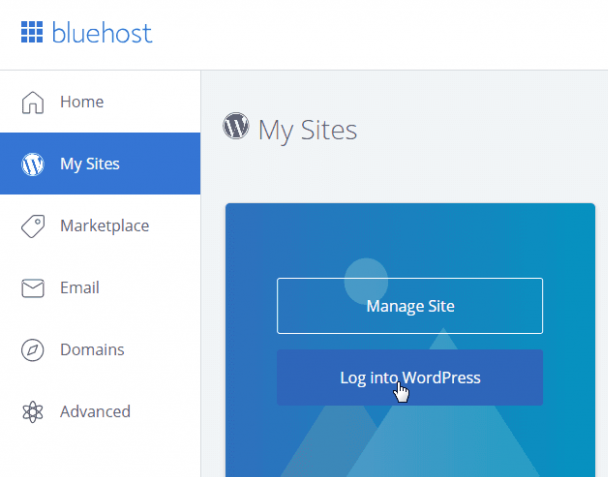
After you download and install WordPress, you’ll need to log into your WordPress dashboard. You can get the direct link to your WordPress by Bluehost or other providers.

Step 3: Selecting a Proper Theme

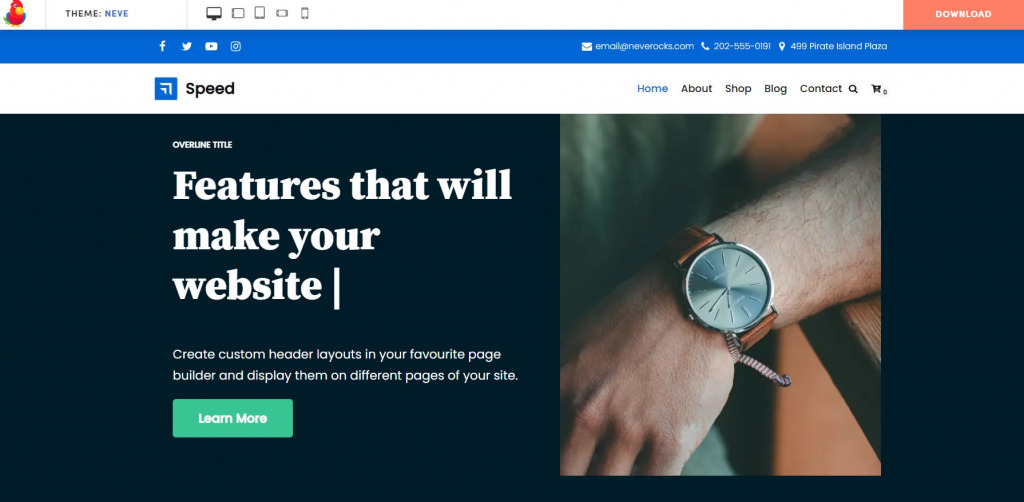
The first thing that website designers should pay attention to is the visual appearance. You should design your website with a theme that matches with your brand, logo color and the overall style of your product.
An important aspect of your web design is having a fully responsive theme. Luckily for you, WordPress offers many themes with both free and paid versions.
You can ‘demo’ each one to see which one best suits your site’s intent and ambiance. Follow these easy steps:
- Access your WordPress dashboard.
- Go to ‘Appearance,’ and click ‘Themes.’ It’ll bring you to the theme dashboard.
- Click the ‘Add New’ button
- Check out different themes to understand which ones are popular, and which ones match your style. Also the specific industry that your company is based on
- Try different themes until you find a suitable one.
- Click ‘Install’ to download it.
- After installing an ‘Activate’ button will appear before you. When you activate the theme it will be directly applied to your existing website.
You can also browse or download the zip files of the themes. Then reupload the theme files in the wordpress dashboard, install and activate in the same way. After you’ve placed your theme, you can customize it by selecting the Customize option from the Appearance menu.
This will launch the theme customizer, where you can change your theme settings while observing a visual display of your website.
And you don’t need to be troubled about – whether you go with a free theme or a paid one, you can always modify it in future.
There is a variety of price ranges among themes. You can get the themes within 10$ to around 250$.
After you set up your theme you can start with installing the necessary plugins for your website.
Step 4: Installing Plugins

You should think about installing plugins to enhance the productivity of your WordPress website. You’ll find a plethora of options for every category, from maximization to website traffic dashboard to safety.
However, don’t overdo it when it comes to installing plugins. Installing way too many plugins can slow down your website, crash if not updated properly. And also sometimes similar plugins clash with each other’s functionality.
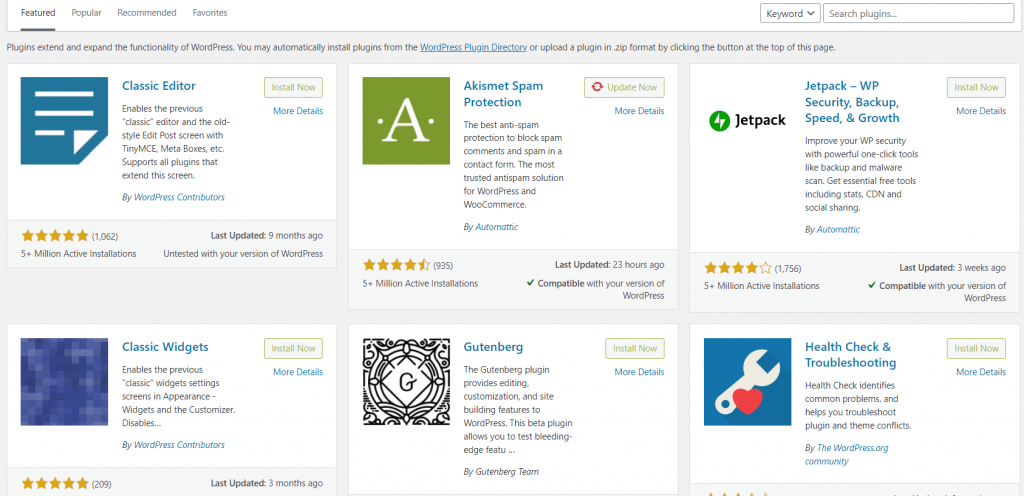
How to Install Plugins
- Go to the Plugins from the WordPress Dashboard side menu.
- Click ‘Add New’ and go through the plugins section.
- Find the suitable plugins that you need for your website.
- Avoid using unnecessary plugins. Those will do nothing but lag your website.
- After you’ve installed the plugins activate the plugins.
Please note that you might not get all the plugins from WordPress directly. You might have to get the plugins from other resources. In that case, upload the plugins the same way you did for the themes. And activate them afterwards.
Some of the necessary plugins for all the websites include contact forms, WooCommerce, page editors, security plugins etc.
Step 5: Adding Content


Now you’re all set to add different contents to your website. Website contents usually are of two types, Posts and Pages.
Posts
Posts include Blog posts. This is a default section in WordPress Dashboard where you can add blog posts. The posts are shown chronologically. The new posts show in the first page and previous or old posts are shown when they were published.
Blog posts are pretty much important for your website visitors to know about your product. If you properly SEO optimize your blogs, you’ll get impressive website traffic as well.
On the other hand you can also add a news section instead of the blog section. In this page you might share the updates about your product.
To display your most recent posts, you can create a separate page for your blog or news category. Or if you don’t want to, you can erase the blog section altogether. But we recommend keeping it for organic traffic.
The correct strategy is to separate the contents into relevant sections by independent ‘Text Blocks’. Also you can add headings, images, videos, internal links as well as embed Youtube videos
Pages
Now coming onto how the pages work. WordPress Pages are one-time content that does not require updating or changing. This includes content such as ‘About Us,’ Terms of Service,’ and ‘Contact Page,’ ‘Privacy Policy’ etc. which will generally remain the same over time.
You can add contents in pages the similar way you added contents in the posts. Include text, links, images, videos, audios, contact forms and other media.
After you’ve finished adding content to your page, hit the publish button to publish the page on your website.
Repeat the process by creating additional pages for distinct sections of your website.
Step 6: Manage Your Website Settings


Now that your website is ready, you can concentrate on creating strong content that will help you increase traffic and engagement. For that, you’ll need to concentrate on perfecting the page contents before publishing your website.
Site Title
The first thing you need to do is give your site a proper title. Because after you create a site, WordPress does not give a proper title to a website.
- Go to your WordPress dashboard and sign in.
- Navigate to ‘Settings,’ next go to the ‘General.’
- Replace ‘Site Title’ with the title of your website.
- Explain briefly what your website represents next to ‘Tagline.’
- Click the ‘Save Changes’ button.
Comments
WordPress includes a built-in comment system that allows your website visitors to leave comments on your posts.
Even though it increases traffic and user participation, it is also a large target for phishing scams.You’ll need to enable comment moderation policy on your website to comply with this.
- Go to your WordPress dashboard and sign in.
- Click ‘Settings,’ then ‘Discussion.’
- Check ‘Comment must be manually approved.’ As a result, you have the option of whether or not to publish a comment (new ones will appear in your dashboard).
After you enable this option you can avoid a large number of scammers by filtering out their comments into your website. Your website will not only flourish but also will be a safe place for visitors.
Navigational Menu
Users can use navigation menus to navigate between separate pages or sections of your website. WordPress includes a robust navigation menu system, which your WordPress theme makes use of to display menus.
- Sign in to your WordPress dashboard
- Scroll your mouse over ‘Appearance,’ then press ‘Menus.’
- Insert a name for your menu next to ‘Menu Name,’ then choose which pages to include from the list on the left.
- For the time being, you should select primary – you can always change this if you’re dissatisfied with the current version.
Homepage
You can select either a dynamic page or a static page for your homepage. What you’ll need to do is,
- Sign in to WordPress.
- Go to ‘Settings,’ and then ‘Reading.’
- You will be directed to a page of ‘Reading Settings,’ the first being the ‘Front Page Displays.’
- Choose between ‘Your most recent posts’ and ‘A static page.’
- To make your homepage changes permanent, click the ‘Save Changes’ button.
Conclusion
That’s all for you to build the dream website that you’ve always wanted. With this ultimate guide, you know now how to build a WordPress website in 2022. We hope that you build an amazing website with fantastic contents, a domain name, and a professional hosting provider.
We recommend that you promote your website with the right marketing policies such as email marketing.
We published this article so that you don’t need to go out for website designer hunting for your website. You’ll just need a few hours of your life to build the website and get familiar with the functionalities.
Finally, our last tip will be to update your website from time to time. Update the theme and plugins that you’ve installed when a higher version releases. That way you can steer clear of the unnecessary struggles of slow and lagging websites.
If you enjoyed this article, please leave a comment to share your thoughts and opinions.