
E-learning is one of the highest growing online services in the recent past that many are searching for. To get a share of this growing niche, you can successfully create and launch an online course.
Creating an online course website presents you with an amazing opportunity to get the course out there for people to buy. To make this as easy as 1,2,3, MasterStudy LMS is your much-needed helper in this journey.
MasterStudy LMS is a developed WordPress plugin that helps you to create courses with various types of lessons, assignments, quizzes, and zoom meetings in an easy way. MasterStudy will help you not only build your courses but promote and sell them right from your website.
So, if you are looking to create your own e-Learning platform, you should consider MasterStudy LMS. To help you get the drift, we have created a simple, yet a detailed step-by-step guide to help in setting up your own WordPress LMS website using the Astra theme.
How to create an online course website with Astra and MasterStudy LMS?
- Why choose MasterStudy LMS?
- System requirements
- WordPress Plugin Installation
- Installing the PRO Version
- Designing the LMS Website
- Add a starter template
- Customize the site
- Installing MasterStudy LMS
- Add a course
- Creating quizzes for your course
- Monetization and WooCommerce integration
- Add the payment methods
- Conclusion
Why choose MasterStudy LMS?
Generally, MasterStudy LMS is your greatest helper when it comes to creating an online course. The many things you need for the online courses will not be successful without this much-needed help.
MasterStudy LMS will help you both develop and manage your online courses. It provides you with a platform that instructors can use to highlight and students can use to learn skills at their convenience.
The MasterStudy has outstanding features that help you scale your e-learning business while providing the best experience to the students. The features and tools includes:
- Advanced quizzes.
There are a variety of quizzes available on this platform – Multi-choice, single choice, true or false, keywords, fill the gap, the list is endless. - Interactive and live lessons
- Certificate builder
- Co-instructors
- Assignments
Getting started
In this guide, we will focus on how to create an online course website with Astra and MasterStudy LMS. This platform offers you the ease of use and maximum customizability required for an online course. It is very easy to use as we will see below.
System requirements
Before you get too excited, let’s see if you have the required system requirements. To successfully use the MasterStudy LMS Plugin without any technical hitches, you will need:
- A server that supports WordPress 4.6 or Greater. For best results, you can use WordPress 5.5 or greater with the Cost Calculator Builder Plugin
- PHP 7.2 or Greater
- My SQL version 5.6 or Greater
- WP Memory Limit of at least 128 or greater.
It is important to know that if your site is hosted on a server that has an older PHP, you can experience issues. Consult with your hosting provider to get an upgrade to the latest version of PHP.
WordPress Plugin Installation
The WordPress Plugin gives you a choice between a free and paid version. The installation method of the Masterstudy LMS is the same as any other WordPress Plugin. There are two ways to do this –
The first way, download the plugin from the default WordPress.

The second way to install the WordPress Plugin is as follows:
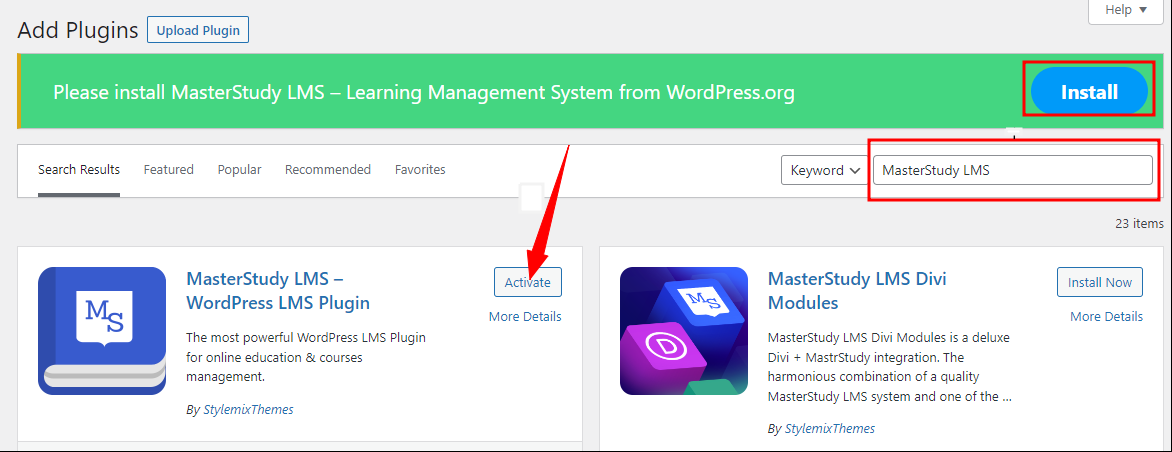
Go to Dashboard > click on plugins > click on add new path.
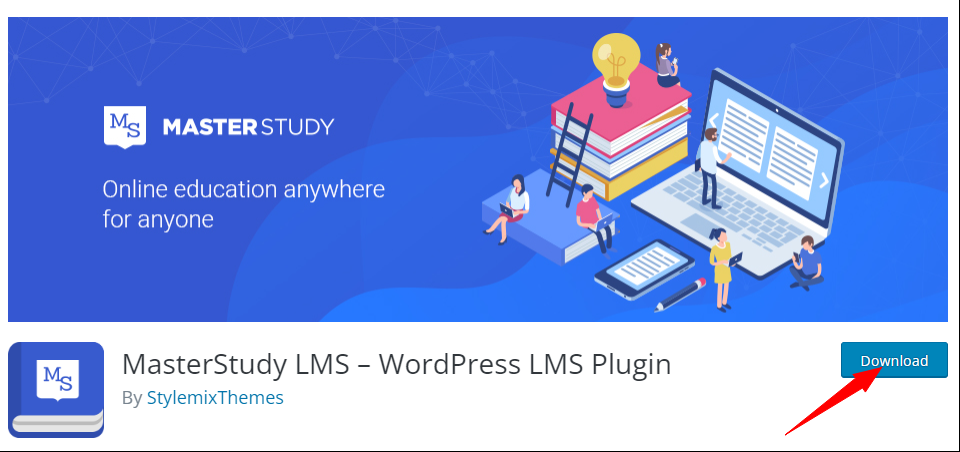
On the new page that opens, search for MasterStudy LMS Plugin and install the Plugin. Once installed, activate it.

Installing the PRO Version
The MasterStudy LMS Pro Version is purchased from the Official website. This version will only work if the Free version is activated on the website. We will guide you on a step-by-step guide without screenshots that you can follow once you purchase yours.
Once you have purchased the PRO version, you will receive an email from Freemius with the link to the plugin zip package, your license code, and instructions to set up.
Once you receive the Freemius, you will need to install it. Follow the dashboard, click on Plugins, tap on add new. Click the Upload Plugin button and upload it from the Freemius. Click Install now and wait for the process to finish. Once the plugin installs, you will need to activate it. Once you click on activate plugin you will be directed to another page to activate your license. Use the license key received in your email to enter in the field provided. Finally, click agree & activate the license to confirm activation. After the activation, you will receive a notification for successfully activating the PRO version.
Designing the LMS Website
Now that you have your Plugin, whether free or PRO it’s time to design your website. Start by choosing a theme for your online course website. Astra theme is one of the best and most popular WordPress themes. It has millions of downloads and reviews from its users.

Astra theme makes it easy to design your website and offers you plenty of Templates to choose from with popular page builders like Beaver Builder and Elementor.
Setting up your MasterStudy LMS website with WordPress
You will need to have a domain name, web hosting services, and WordPress installed in your computer.
Start-off by installing Astra. Download the MasterStudy LMS plugin from the WordPress Plugin store and customize it as follows.
Choose the design Module
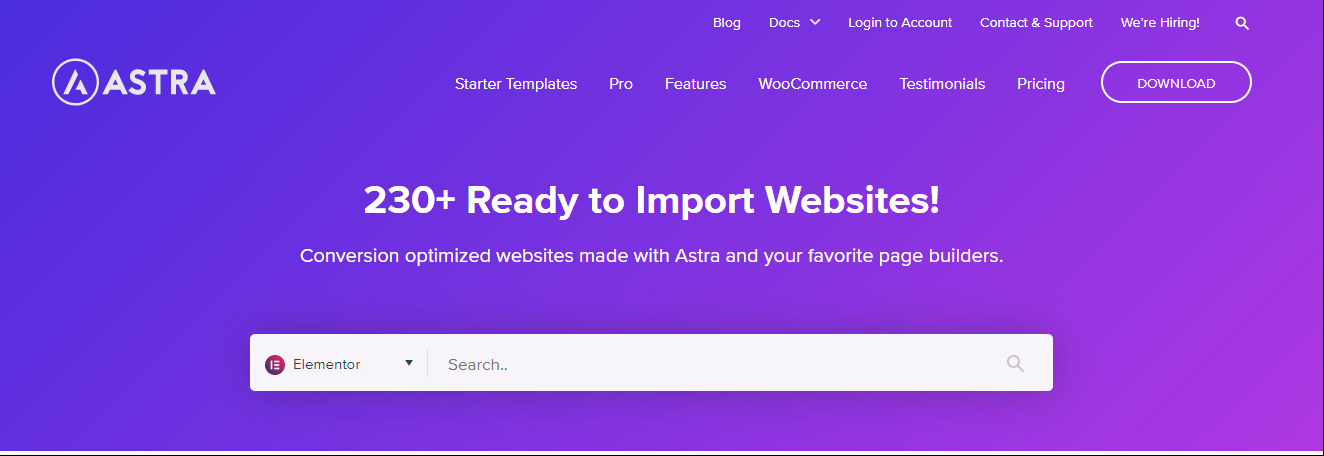
Choose Astra as the theme for your site and use its respective starter templates. For this requires two components – the Astra theme and Astra starter templates plugin. Get the Astra theme first.
Go to the Appearance tab on WordPress and click on Themes > click on Add New > search for Astra.

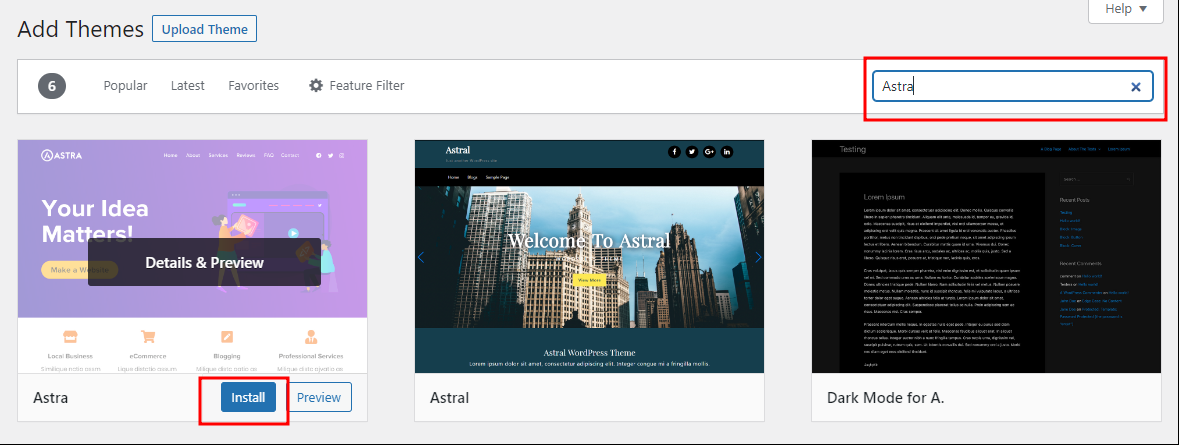
Click Install then Activate to get the Astra theme.
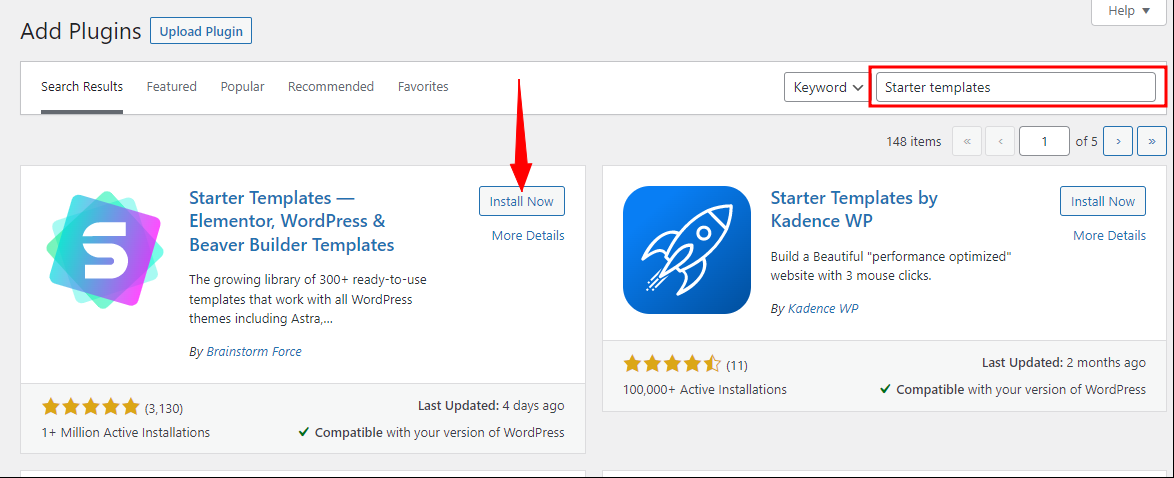
Once Astra is activated, get the Starter Templates from the Plugin menu in WordPress.
Go to Plugin > click on add New > search Starter Templates > click Install and activate the plugin by Brainstorm Force.

You now have a wide variety of starter templates offers.
Add a starter template
You will notice your WordPress appearance tab will have 2 new categories available – The Astra and the Starter templates.
If you click on the starter template tab and see the wide range of starter sites Astra offers you. The free version offers you a wide range and the Pro version has over 180+ templates to choose from. You can import one of these templates to your site.
After that choose a page builder – We recommend you to try Elementor, its as a good choice.


The free starter templates will show availability while the PRO version shows a premium tag on top. To make the search easier, filter the free version templates and select the Brandstore starter template.
Select the Appearance and starter templates from the side menu. From this menu search for Brandstore from the available templates. Select import complete site and wait for the process to complete before you continue.


Customize the site
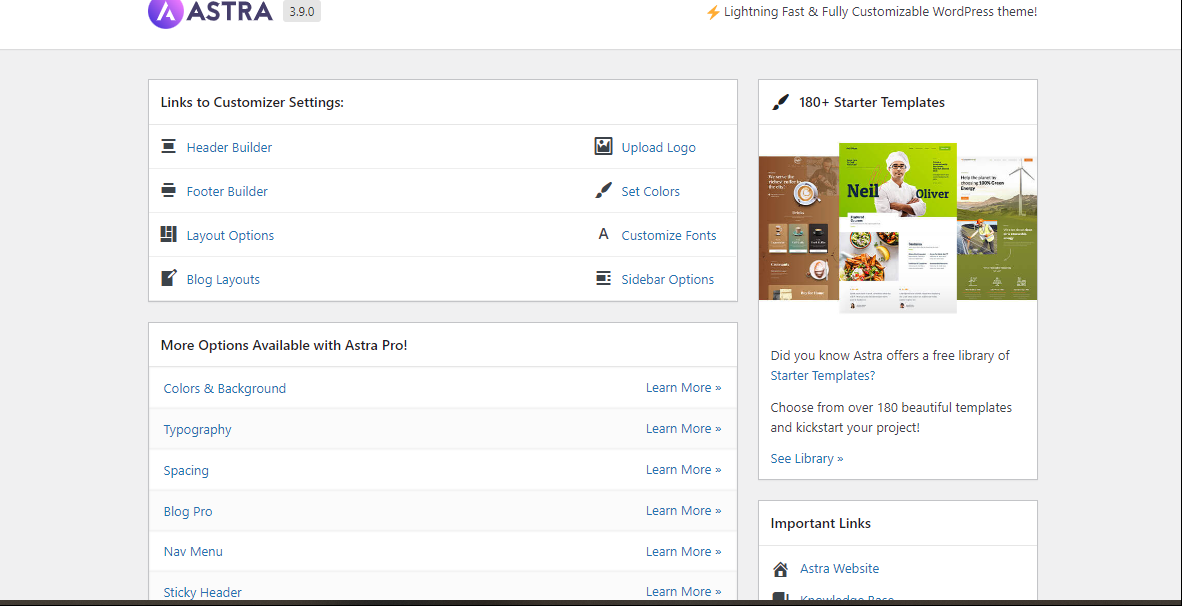
Once the import is complete, it’s time to customize the WordPress site. There are several ways to do this – Use the Astra options panel or edit each individual page.
How to use the Astra options panel – select the Appearance and Astra options from the dashboard menu. Choose an option from the page and edit it accordingly. Edit the header, footer, colors, layout, navigation and any other part of your website.
How to edit per page – Choose the page or all the pages you want to edit. Then choose edit under the page you want to edit. If you choose to use the Gutenberg block editor, you will see the page come up with the blocks ready to edit. In this case, we chose the Elementor page builder so you will see an option to edit with Elementor. Select that option and bring up the Elementor Interface to help you make all the changes you like.


There are many customizing options available from this menu. You can go to the global option and change the typography, buttons, and many other things.
Additionally, you can go to Appearance, and click on Astra options to upload a logo or change the fonts. If you have the PRO version, you will be able to see many features.

Installing MasterStudy LMS
With the theme added and customization done it’s time to get the MasterStudy ready.
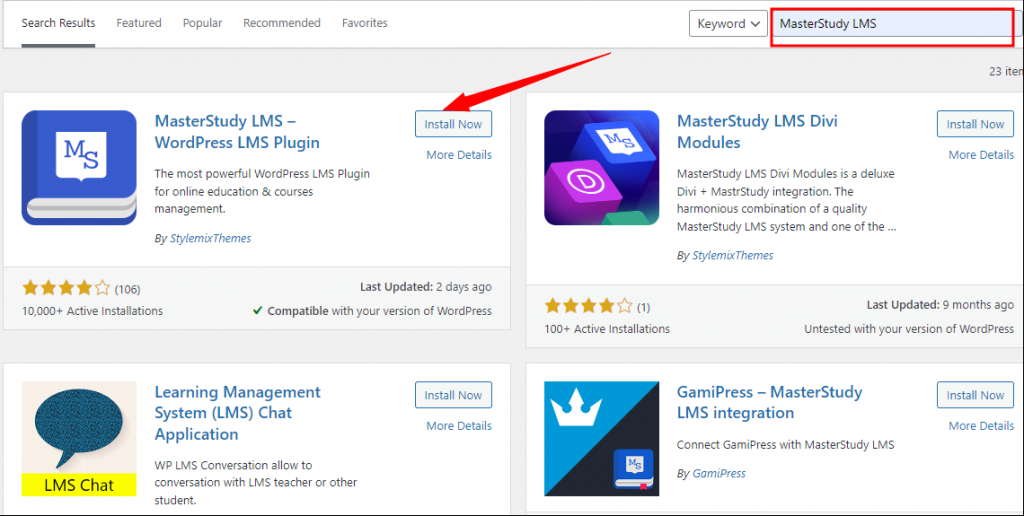
Navigate the WordPress plugin menu in search for MasterStudy LMS. Click install now and activate it and it’s ready for use.

Add a course
Now that the MasterStudy LMS Plugin is installed, it’s time to create a course. Click on Add New Course from the course page.

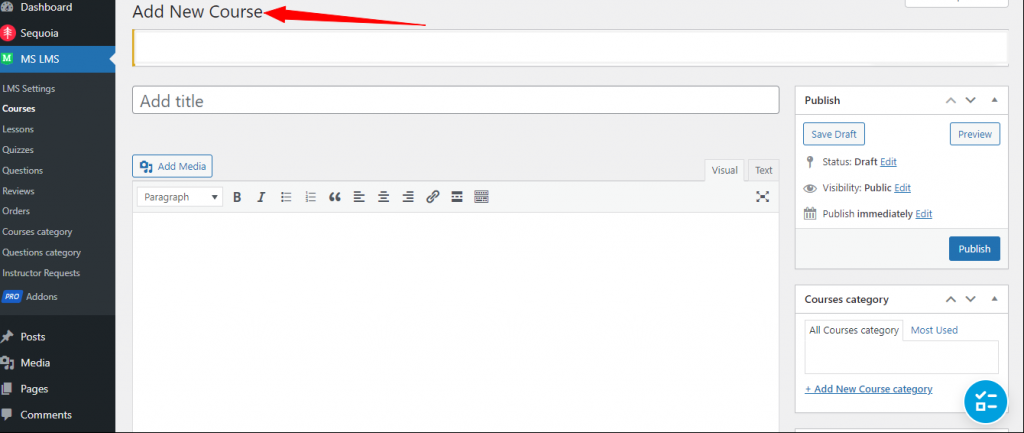
Add an attractive title for your course and a description so your audience will understand exactly the skills you are offering.
Set the number of students to enroll for the course, and also determine a difficulty level for the course.
MasterStudy LMS has plenty of customizable options that you can choose to make your course more friendly. There is an option for the embedded video that allows you to link videos from YouTube or any other platform. You can also have a Q&A section for your students – overall, customize your course platform as best as you can.
Creating quizzes for your course
The MastereStudy LMS plugin allows the creation of many types of quizzes for students. You can have different types of questions here. You can also set limits and timers to quizzes that have an auto-grading system. This allows the students to take the quizzes at their convenience and get the results automatically. This is a great time saver.
To create the quizzes, follow these steps
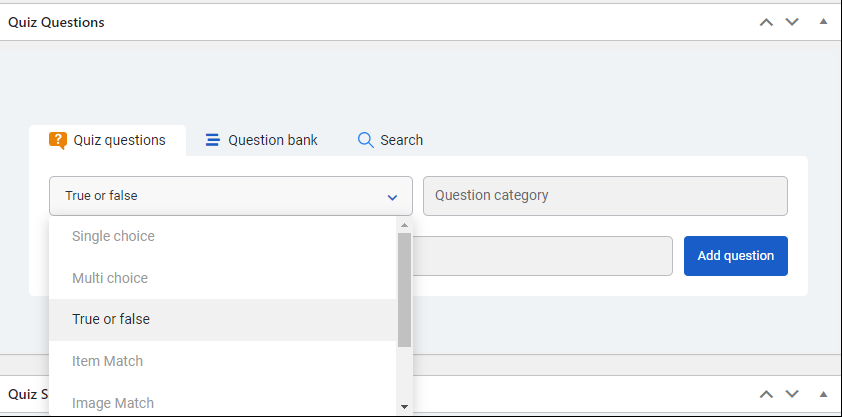
Under the MasterStudy LMS plugin, click on Quizzes >Add New. Type in a title for your quiz.


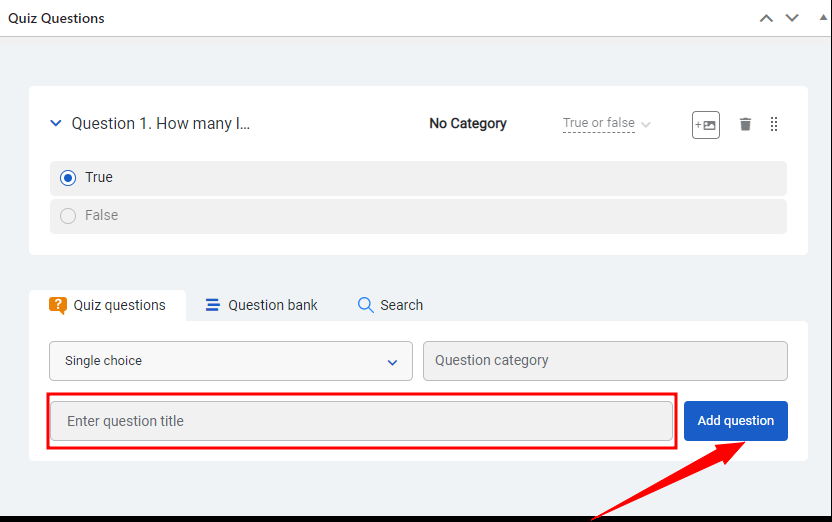
Once you have a title for your questions, go ahead and choose what type of questions you want them to be. Scroll down to the Quiz Questions and choose what type of questions you want to add. Are they multi-choice, true or false, single-choice, or fill the gaps?

Include as many questions as you would like to. Use the Question Title and Add Question.

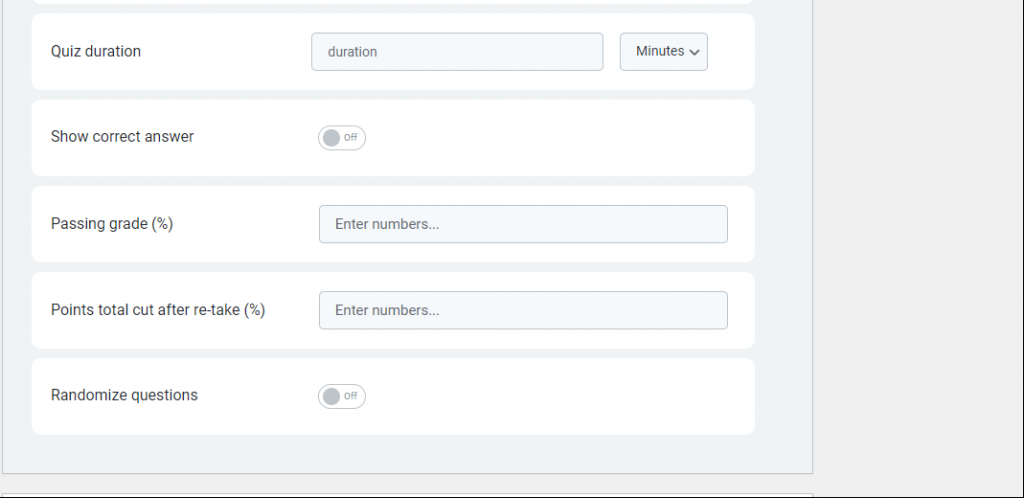
Include other details about the quiz, for example, quiz duration, passing grade, pass mark, retake marks, etc.

Monetization and WooCommerce integration
So, its time to talk all things money! All your hard work will come to fruition when you monetize your courses. The MasterStudy LMS supports the full integration with WooCommerce.
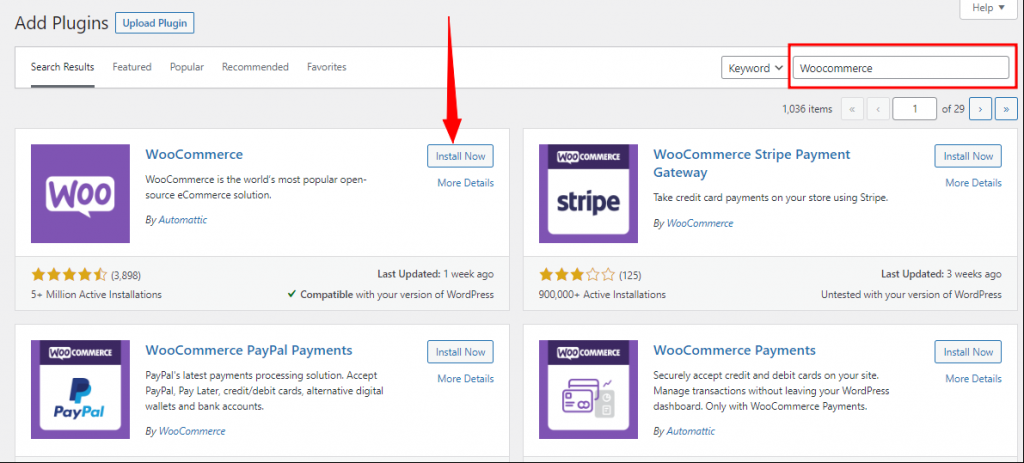
To enable WooCommerce, you will need to download and activate the WordPress Plugin. Go to the Plugin menu and search for WooCommerce. Install and activate it first.

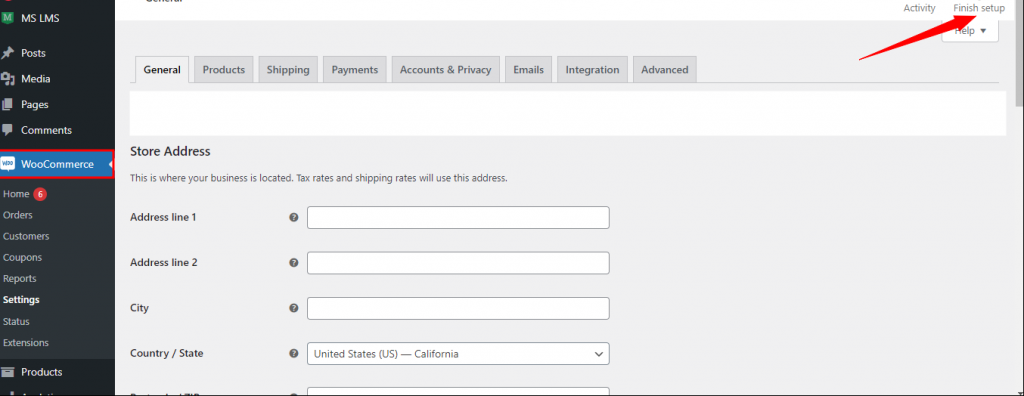
Once you install WooCommerce, it’s time to set it up. To set it up, click on dashboard>Click on WooCommerce > settings and complete the setup.

Add the payment methods
Now that you have finished setting up your WooCommerce, its time to set up how you are going to accept the money.
To do so, go to WooCommerce settings and navigate to find payments.

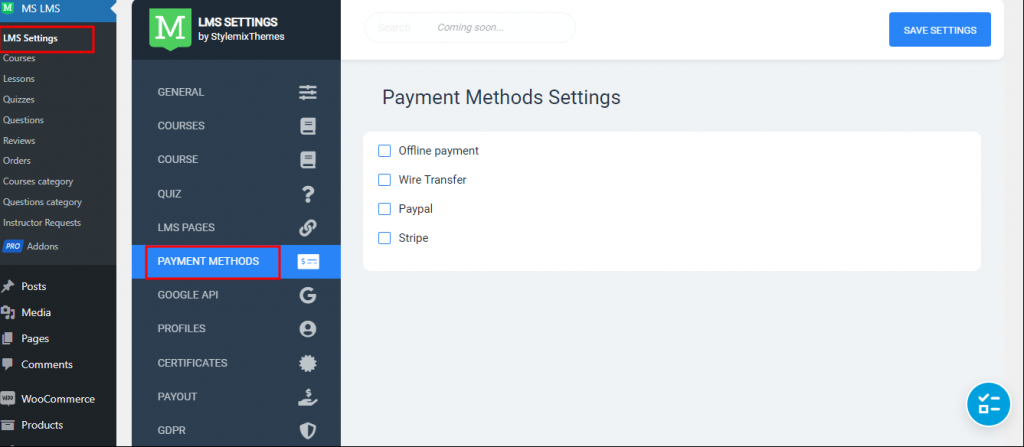
Here you will be able to see all types of payment methods. Choose the one favorable to you.
If you want to work out an easy way to share commissions from a sale between multiple instructors, go to MasterStudy LMS settings, then click on enable earnings. You can also set the amount of commission you want each instructor to receive.
Conclusion
Congratulations! The long journey of creating an online course website with Astra and MasterStudy LMS is now complete. The first most important step is complete but you have many more things to do. The next action is to market your e-Learning site and attract a growing audience.
Along the way, you can keep customizing your WordPress site until it reflects what you want this platform to. You have many features to use on this platform either for free or Pro Versions. Don’t forget to enjoy the journey as you grow your new website.